Sunday, December 26, 2010

Anischräbeli (Aniseed Cookies)


Since my previous post was about how much I enjoy Swiss cookies, I thought I'd share my all-time favourite. Anischräbeli. Phonetically it's pronounced "arnis-cra-bell-ee", well close enough, this is the best I could come up with. Anywho, the name is not so important, what is important is this cookie is like no other cookie I have tasted, and certainly nothing like any cookie I can buy where I live. Which is kinda weird, since it's such a simple thing to make (despite how complicated the recipe may appear).

I guess if you don't like aniseed then you might be scared to attempt this recipe, but let me just say I was never a big fan of it either. But the aniseed flavour in these is not overpowering, it just leaves a lovely glow in your mouth. It's not so scary. I should also mention that the cookies are of the hard variety, however, they are supposed to be that way but will also soften in time. You get the best of both worlds. They also store well for ages, so this recipe makes a large batch.

Ingredients:

4 eggs
500g icing sugar
1 pinch salt
1 Tbsp kirsch (optional)
1 & 1/2 Tbsp whole aniseeds, or 1/2 tsp aniseed oil
550 - 600g flour

Method:

Use a food processor, or mixer, and combine the eggs and sugar until they are pale, fluffy and smooth, this will take about 5-10 minutes. This can also be done by hand with a whisk, but you get better results with a food processor (and it won't give you tennis elbow!).

Add the salt, kirsch and aniseed. Mix well. Knead the dough.

Take some of the dough and use your fingers to roll it out. You want to create a long cylindrical roll that is approx 1.5cm thick. Cut the roll into segments that are 5cm in length.

Make 3 slices halfway through each of them.
Bend them to create this shape:


Place them on a greased or lined oven tray, and continue the process until you have used all of the dough. Leave the trays of cookies to dry overnight (uncovered and at room temperature), or for up to 24 hours.

Bake at 140 Celsius, using the lowest oven rack, for about 20 minutes. You want the bottom to get slightly browned, but the top to stay pale.

Makes approx 95 cookies.

Thursday, December 23, 2010

Honigherzli (Honey Heart Cookies)


I'm not such a fan of fruitcakes or Christmas puddings or fruit mince pies. In fact, I kinda loathe them. What I do love are Christmas cookies. So when it comes to my Christmas baking I love to whip out my mother's best cookie recipes.

Cinnamon, hazelnuts, almonds, clove powder, aniseed. These are the flavours that conjure up the smells of a yummy Christmas. I know I'm biased, but I reckon Swiss baking is amazing. So here is the recipe for the first batch of cookies we made this year. These would also look great in other shapes, but since the recipe name is "honig" (honey) "herzli" (little hearts), it seems weird to make any other shape. But feel free to rebel.

These cookies are yum even if you choose not to glaze them. They have a nice soft texture and are great for dunking. But the best thing about them is the lovely harmonious combination of honey, spices and lemon. Subtle, yet delicious. Leave some out for Santa, he's bound to love 'em.

Cookie Ingredients:

100g sugar
1 egg
25g margarine (or butter)
100g honey ( use thick/solid honey, not the runny stuff, for best results)
grated rind of half a lemon
1 pinch cinnamon
1 pinch clove powder
240g plain flour
50g ground almond
1 tsp baking powder

Glaze:
60g dark chocolate
2 Tbsp water
60g icing sugar

Method:

In a large bowl, beat the sugar and egg until it becomes fluffy and aerated.
 
Add the margarine and honey to a small pan, heat until they melt completely, then add to the large bowl and stir.

Mix in the lemon zest. cinnamon and clove powder.

Add the rest of the dry ingredients, add a little more flour if needed then lightly knead it, leave aside to rest for half an hour.

Roll out the dough, on a floured bench, until it is 5mm thick. Cut out the hearts.

Bake at 180 Celsius, for 10 minutes.

Let the cookies cool.

When they are cool, melt the chocolate and water together.

Sieve in the icing sugar. Stir well, then glaze the cookies.

Makes approx 29 cookies

Saturday, December 18, 2010

Rösti (Potato Pancake) With Cheese And Bacon


I've just arrived home to my parents and will be staying with them over the summer. I thought while I'm here I should make the most of my mum's company and get some more cooking tips. Cooking together is a great way to bond with someone and I think it's a wonderful thing to pass on recipes, especially family recipes. As a first generation Kiwi  I  like the idea of keeping my Swiss heritage alive, even if it's merely through my cooking, so I aim to delve into it more.

One of the quintessential Swiss dishes that I remember my mum making throughout my life is rösti (pronounced "Rurshtie"). Most often we'll just eat it plain as a side dish, but when you amp it up with cheese and bacon and a side salad, it can pass off as a quick meal on its own. So I asked my mum if she would cook this with me, even though I already knew how to make it (having spent lots of time with her in the kitchen as a child) I still picked up heaps of useful tips, and since I'm so generous I shall now share them with you! It tastes just as great without the cheese and bacon, so feel free to leave that step out.

Ingredients:

  • 1.2 kg potatoes (about 12 small-medium potatoes). Use a waxy potato, something like red potato is ideal.
  • Butter
  • 1 tsp salt
  • 250g middle bacon, chopped and fried.
  • 8 slices cheese, any mild table cheese of your choice, one that will melt nicely. In Switzerland my mum would use  Tilset/Tislter.

Method:

Boil the potatoes (whole with skin on) and allow to cool. For best results use boiled potatoes that are a few days old. Peel the potatoes and grate them.

Heat a couple tablespoons of butter in a moderately hot frying pan.
Add potatoes and sprinkle on the salt. Sauté for about 10 minutes until about half the mixture has gone golden brown. Stir it gently so as not to mash the potatoes. Turn the heat down to medium.

Press in the sides and top of the rösti to create a round flat pancake and add a couple more tablespoons of butter to the edges of the pan. Do not stir any more. Cook until the underside is all golden brown.

Place an inverted oven-proof plate on top of the rösti and flip the frypan over so the rösti is now on the plate (golden side up).

Sprinkle on the cooked bacon evenly. Lay the slices of cheese on top.

Place the plate under the grill in the oven until all the cheese has melted.

Cut into wedges and serve.

Sunday, December 12, 2010

Strawberry & Rhubarb Cardamom Shortcake


If you are looking for a delicious summer treat then look no further. This recipe has become a total favourite of mine. The shortcake crust crumbles perfectly when you bite into it, but then it melts away so effortlessly into your mouth and the addition of the cardamom is definitely its secret weapon, did I also mention that the filling has the perfect balance between sweetness and tart?

Long story short: it's awesome. Whenever I've made it there have always been requests for more, so either the people I know are huge gluttons, or it really is a winner. Could be a combo of both. So from now on I think I may have to start doubling the recipe, though I may be tempted to keep a whole one for myself. It's yummy eaten hot or cold but I think I prefer it cold and even better eaten the day after. So this could be an ideal recipe for those times you want to create something a day ahead.

You might also want to note that the pastry is not soft like the American version of shortcake (which is more like a scone).

Btw if you don't like cardamom then just leave it out, it will still taste great. I did this when making it for my dad as his palate is not so adventurous, but since cardamom really makes this dish special , I think I will sneak some into the next batch that he has already requested; and if he doesn't like it then I might just have to eat it all myself. What a shame.
 edit: he loves the cardamom version. Thankfully he still shared some with me. Win!

Ingredients:


Pastry:
125g butter
125g caster sugar
12 cardamom pods, seeds removed and ground (approx 1 tsp)
1 egg
1 tsp baking powder
300g flour

Filling:
2-3 medium sized stalks of rhubarb, chopped (no more than 300g)
3 Tbsp vanilla infused caster sugar,  just use standard caster sugar if you don't have it
1 punnet strawberries (250g)

Method:

Cream the butter, caster sugar and cardamom. Beat in the egg.

Add baking powder and flour, mix until just combined then knead until it forms a smooth ball of dough.

Place in fridge to rest for 30 minutes then remove from fridge so it will be at room temperature before rolling it.

Prepare the filling by heating the rhubarb in a fry-pan with the vanilla sugar, cook over a low heat until the rhubarb is almost cooked then add the strawberries, toss briefly, taste to see if it needs more sugar then set the pan aside to cool until lukewarm.

Line and/or grease a 23cm round or square tin.

Cut the pastry dough in half. Roll out one half and place in the bottom of the prepared tin.

Spread the filling evenly on top.

Roll out the other half and place on top. Press the edges of the 'lid' down.

Bake for 30 minutes at 180 Celsius.

Cool it in the tin. Dust with icing sugar.

Tuesday, December 07, 2010

Rava Idli (Steamed Semolina Patties) With Coconut Chutney


Breakfast foods for me used to consist of things like toast or porridge or the occasional Birchermüesli if I wasn't feeling lazy, either way, nothing very exciting. That was until I discovered the kinds of foods some Indians have for breakfast. It was a whole new world filled with tasty meals, more substantial than what I usually consumed.

My discovery really began when I stayed at my boyfriend's grandparents house in Mumbai. Every morning we'd have an array of foods, none of which I was familiar with, yet all of it being utterly delicious and hearty. I made several notes on the dishes and one day I will get around to attempting to recreate them, especially since I just recently found the notebook that I wrote them in. I should spring clean more often. Anyway, although I have yet to attempt her recipes I thought I'd start getting myself back into the habit of eating Indian-style breakfasts, so here is a quick and easy recipe for Rava Idli (which are a steamed semolina patty which you dunk into chutneys of different varieties). My boyfriend and I created a coconut chutney to go with it, similar to what his mum makes.

Idlis may look complicated but they are worth the small effort, we ended up making these for several days in row. Beats toast any day.

Btw you can find the idli moulds at Indian food supply stores, or online.

Rava Idli:

2 T oil
1 tsp mustard seeds
1 cup semolina
1 tsp salt
1/4 tsp baking soda
1/2 tsp baking powder
1 cup yoghurt

Heat the oil, add the mustard seeds and very briefly fry so that they all pop and crackle.

Add the seeds to a bowl along with the rest of the ingredients, stir until combined.

Let the mixture rest for 30 minutes.

Grease the idli moulds with oil and, if desired, place a cashew nut in each mould.

Place 1-2 Tbsp of batter into each mould.

Steam in a pressure cooker for 10 minutes. (Without the whistle).

Makes 20 regular sized idli.


Coconut Chutney:

3 heaped Tbsp grated coconut
1/4 onion, chopped
a marble-sized chunk of tamarind paste
1  tsp grated fresh ginger
1 Tbsp oil
1 tsp mustard seeds
small handful of curry leaves
salt, to taste

Grind (or process) the coconut, onion, tamarind and ginger along with a few tablespoons of water to create a paste.

Heat the oil in a small pan, when hot add the mustard seeds and curry leaves, fry briefly.

Add the coconut paste to the pan and fry for a few minutes.

Add 1/3 cup of water and bring  mixture to a simmer, cook for a couple minutes more.

Salt to taste.

Serves enough to eat with the 20 idli.

Wednesday, December 01, 2010

Gold Kiwifruit Muffins


If you watched a tv show called Shortland Street during the 90s, then you might remember the name "Lionel Skeggins"- though you may not want to admit it. Lionel worked at a cafe near the hospital, had a relationship with crazy-lady Mackenzie, and most memorably, disappeared mysteriously...dun dun dunnn. Shortland Street is one of those naff tv shows that are so predictable that you can tune in and out yet still not struggle to follow the storyline. But despite how naff it is, I will admit it, I watch it. So as soon as I spotted this Shortland Street themed cookbook I laughed out loud, which was rather embarrassing since I was at the public library. The tag line on the back of the book proclaims: "Straight from Lionel's trolley...Rocky Road Muffin, Pecan Muffins, [etc], these taste sensations have completely won over the staff and patients of Shortland Street. You will find them irresistible too." How cheesy is that? Anyhow I am easily amused so I gave the book a whirl. So here is my version of "Lionel's kiwifruit muffins"; I adapted the recipe and chose to use gold kiwifruit as I prefer their delicate custard-like flavour, added a lemon curd centre and I also switched the sugar from brown sugar to vanilla sugar so as to enhance the gold kiwifruit flavour. These are a huge hit at my place and I have made a few other recipes from the book, all delicious. So despite the kitsch outlook, the book actually has some substance...unlike the programme.


Ingredients:
  • 50g butter
  • 200ml milk
  • 2 eggs, beaten
  • 1 cup chopped gold kiwifruit
  • 2 cups flour
  • 2 teaspoons baking powder
  • 1/2 cup vanilla sugar (caster sugar infused with vanilla) or regular caster sugar
  • lemon curd for optional filling

Method:

Melt the butter, then mix it into the milk and eggs.
Add the remaining ingredients. Fold briefly, until just combined.
Spoon half the mixture into 12 greased or lined muffin pans. Place a teaspoon dollop of lemon curd onto each, then spoon remaining muffin mixture on top.
Bake at 200 Celsius for 20-25 minutes.

- recipe adapted from "Lionel's Muffins" (recipes developed by Vicki Hoffmann)

Tuesday, November 23, 2010

Parsley Pesto


Since I have been busy making a whole heap of crackers lately (see previous post) I thought I'd make myself a yummy dip to go with them. However, the only ingredient I seemed to have in a large supply was parsley, so voilà, parsley pesto was born. Funny thing is, I much prefer to use it as a pasta sauce. The manthing loves it on the crackers but I find it a bit too earthy. But mix it with some pasta and a bit of extra parmesan and wow I'm in heaven.

Ingredients:
  • 80g walnuts, toasted
  • 1 garlic clove, crushed
  • 50g parsley leaves, chopped (about 1 large bunch)
  • 200ml extra virgin olive oil
  • 50g parmesan cheese
  • juice of half a lemon
  • salt and pepper

Method:

Blend/process/crush the walnuts and garlic together until it resembles coarse grains.
Add the parsley and blend a little longer. I use an immersion stick blender thingy.
Keep the blender running and add the oil in a slow stream.
Once blended to a thick grainy paste, fold in the parmesan.
Season with salt and pepper to taste, and add more oil if you wish to thin it down.

Wednesday, November 17, 2010

Sesame and Caraway Crackers


There is something really satisfying about knowing how to make items that you'd normally not think twice about buying at the supermarket. You might scoff at the idea of making your own crackers, but it is easier than you might expect (not to mention economical and tasty). My cracker recipe was inspired by a Nigella Lawson recipe for 'Hot Discs', which are a slightly puffed up tortilla chip/poppadom hybrid. They are yum and great for dipping, but I now prefer to make them as crackers (just prick them with forks before baking to prevent any trapped air from puffing them up. I also changed the seasoning because the original didn't have enough zing for my liking, and I added some seeds to give them more substance. Feel free to mix and match your own seasoning, perhaps you could come up with your own favourite combination.

Ingredients:

250g plain flour
1 heaped tsp salt
1 tsp paprika
1/2 tsp chilli powder
1/2 tsp caraway seeds
3/4 tsp sesame seeds
25g cold unsalted butter, diced
100ml hot milk

Method:

Add the flour, salt, spices and seeds to a bowl. Rub in the butter (like you would when making pastry).

Gradually stir in the hot milk. Lightly kneed the dough.

Cut the dough in half and roll it out quite thinly, just a few millimetres thick.

Use a 5cm round cookie cutter and stamp out as many rounds as you can. Place them on a baking sheet lined with baking paper. Prick tops with a fork.

Bake them for approx 5 minutes at 220 Celsius, however, keep an eye on them during baking as your baking time may vary. They will be done when they start to get a slight brown tinge.

Remove them to cool on a wire rack.

Repeat process with the rest of the dough.

Makes 60-70

Monday, November 08, 2010

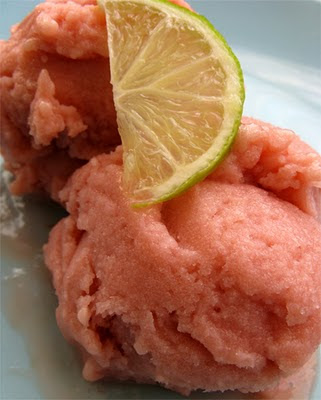
Rhubarb Lime Sherbet


The garden is still overflowing with rhubarb, and while I enjoy using it in baking I thought I should find a new use for it; a girl can only eat so many rhubarb muffins, cakes and crumbles. So when I stumbled upon a recipe for rhubarb sherbet I knew I just had to try. At first I didn't even know what a sherbet was, but after reading I discovered it's a mix between ice cream and sorbet (as it contains some dairy). And wow it is good, so good that I'm already set to make another batch today. The sherbet is so light yet creamy, and the rhubarb flavour really comes through and your mouth is left with a a yummy sweet tang thanks to the lime. This is the best frozen dessert I have ever had, and it is amazingly easy to make. I made it by hand and don't have an ice cream maker and it turned out perfect, so this an accessible recipe that would be ideal for anyone to make, even if you've never made a frozen dessert before.

Recipe adapted from Modern Domestic - original recipe here

Ingredients:

  • 255g rhubarb (2-3 large stalks), washed and trimmed (the redder your stalks, the pinker your sherbet will be)
  • 130 g (2/3 cup) sugar
  • 1/3 cup water
  • 3 tablespoons freshly squeezed lime juice (approx 1 or two limes, don't scrimp on this)
  • 1 cup whole milk

Method:

Chop the rhubarb into thin slices and add them to a non-reactive saucepan along with the sugar and water. Bring the mixture to a boil over a medium heat and simmer it for 5 minutes, so that the rhubarb softens and cooks through. Remove the pan from the heat and let the mixture cool to room temperature.

Once cooled, pour in the lime juice.

Puree the mixture using an immersion blender, food processor or standard blender.

Add the milk and pulse until fully combined.

Fill a large bowl, or even your sink, with some ice and some cold water (enough to just float the ice).

Place the rhubarb mixture into a bowl and set it over the ice water bath. Let it stand for about 20 minutes, stir it occasionally. Now place the bowl into the fridge to chill even further, at least 4 hours.

If you have an ice cream maker you can now use it as you normally would. Otherwise pour the mixture into a sturdy freezer-safe container and place it in freezer.  Remove it from freezer every 30 minutes or so, and break up the ice crystals. Do this until the mixture is completely frozen and can no longer be beaten (about 4 hours).  I used an immersion blender to beat it, but you could transfer the mixture to a blender or just beat by hand with a hand tool such as a sturdy whisk.
If my instructions are a bit confusing, you may want to read this great article about how to make ice cream without a machine.

Tuesday, November 02, 2010

Grilled Chicken, Tandoori Style


I spotted this recipe in a book on healthy Indian cooking, and while to me it doesn't compare to proper tandoori chicken, it's delicious in its own right and has now become my new favourite 'go-to' recipe for grilled chicken. So while I find it a stretch to call it a tandoori chicken, I have no trouble labelling it as amazing, succulent, tender, and guilt-free. Problem is, though it maybe lower in fat than other grilled chicken recipes, you may find you want to eat more portions 'coz it is just so damn good!

(Recipe adapted from Shehzad Husain's Healthy Indian Cooking)

Ingredients:

1 whole chicken, weighing about 1.5kg
150ml plain unsweetened yoghurt
1 tsp ginger pulp
1 tsp garlic pulp
1 Tbsp tomato purée
1 tsp paprika
2 Tbsp lemon juice
1 1/2 tsp ground coriander
1 tsp garam masala
salt

Method:

Skin the chicken and cut it into 8 pieces. Make 2 deep slashes in each piece to allow flavours to penetrate through. Alternately poke holes in it using a fork (hint courtesy of my manthing).

In a large bowl: mix the yoghurt, ginger, garlic, tomato puree, paprika, lemon juice, ground coriander, garam masala and 225ml water and add salt to taste.
Pour mixture over the chicken and marinate for at least 3 hours or overnight.

When ready to cook, heat oven to its highest possible temperature. Lift the chicken pieces onto a lightly greased baking tray and place in oven.

Cook for 15-18 minutes, but keep an eye on it during this time to make sure it doesn't brown too fast. If it does, just turn the oven down a bit.

Check if it's done by piercing the thickest part of the chicken flesh with with a knife, the juices should run clear not pink.

Serves 4.

I like to serve it with black-eyed-bean-salad.

Tuesday, October 26, 2010

Black-Eyed Bean Salad


I have become a total fan of using dried beans and legumes, it's amazing how economical they are, not to mention how tasty and healthy. My favourite at the moment is the black-eyed bean, no it's not a pea, it's a bean, and they are packed full of calcium, iron, folate and vitamin A. (Thanks Google). I think they are particularly cool because they have their own unique flavour and are yummy to munch on their own without the addition of other ingredients. That said, they are well suited to many different recipe ideas. Like this here bean salad. I guess this recipe is similar in taste to an Indian kachoomber; a salad based on tomatoes, onion, and coriander. So it would be well suited sitting alongside a spicy main course. It has a nice summery freshness about it thanks to the lemon juice and mint, and would be great to take along to a BBQ, especially as it's one of those recipes which you can just throw together, but tastes like you slaved away on it.

Ingredients:
  • 4 tablespoons of dried black-eyed beans
  • 2 tomatoes, chopped
  • 1 onion, finely chopped
  • 2 Tbsp fresh coriander leaves, chopped
  • 1 Tbsp fresh mint leaves, chopped
  • 3 cloves garlic, crushed
  • Juice of one lemon
  • 5 black peppercorns, coarsely ground
  • salt, to taste


Method:

Soak the black-eye beans for a few hours, or overnight. Boil in salted water until tender. Drain and set aside.

Place the rest of the ingredients in a bowl and salt to taste. Briefly toss everything together with a fork.

Garnish with fresh mint.

Serves 3 as a side dish.

Wednesday, October 20, 2010

Rhubarb Crumble Cake


This recipe is pilfered from Annabel Langbein. Annabel has her own tv show on here at the moment in NZ. I've seen it a few times and rather enjoyed it. She has a style of cooking that is down to earth and she likes to use seasonal ingredients,  plus her recipes are often very adaptable. Totally up my alley. So, seeing as the rhubarbs are still flourishing in the garden I thought I'd put them to good use in one of her recipes. Feel free to replace the rhubarb with some berry fruits, or any other fruit you'd like. You could also mix and match the nuts in the topping to suit your needs. The cake itself is so moist thanks to the yoghurt, and the topping has lovely contrast between the tart rhubarb and sweet nutty crumble. I've eaten this warm with vanilla ice cream, and cold with berry yoghurt, and it's also delicious just enjoyed on its own. It's a real winner.

Ingredients:

140g butter, softened
1 cup sugar
2 eggs
1 tsp vanilla essence
3/4 cup plain yoghurt
2 cups flour
3 tsp baking powder
1/2 tsp baking soda
3 stalks rhubarb, thinly sliced, or 190g berry fruits or other chopped fruits

Topping:
1/2 cup firmly packed brown sugar
1/2 cup slivered almonds or any other chopped nuts of your choice
4 tbsp flour
1 tsp ground cinnamon
60g butter, melted

Method:

Cream the butter and sugar, then add the eggs and vanilla and beat well.

Mix in the yoghurt then add sifted dry ingredients, stir until just combined. It will be a thick consistency.

Spread the mixture into a lined 25cm spring-form or loose-bottomed cake tin. I used a silicone 'tin' and had no trouble flipping it out, so this is also an option.

Sprinkle rhubarb over the top.

Combine all the topping ingredients and sprinkle over cake.

Bake at 180 Celsius for 50-60 minutes.

Let it stand for 15 minutes before turning out.

Friday, October 15, 2010

Rajma (Red Kidney Bean Curry)


I've been cooking Indian cuisine for a few years now, but I'm still surprised how a small select group of spices can create a multitude of unique tasting dishes. I guess I have about 15 spices that I use from time to time in my Indian cooking, but I always make sure I'm not lacking in my supplies of chilli powder, cumin, turmeric, coriander, and garam masala, as they are staples in most recipes. So here's a simple dish that uses some of the basic spices that most fans of Indian cooking would (or should) have in their cupboards. This dish is incredible hearty and can handle a lot of chilli without it becoming overpowering. It's one of those dishes that I actually prefer to be on the spicy side. Or perhaps my tolerance for chilli is increasing. However, feel free to skip the dried red chillies if you prefer it a bit tamer.

Ingredients:
  • 1 cup dry kidney beans, soaked overnight then cooked. (Or use two 400g tins of beans if it's more convenient).
  • 2 bay leaves
  • 2 dry red chillies
  • 1 onion, grated
  • 2 garlic cloves, crushed to a paste
  • 1 tsp fresh ginger paste
  • 400g tin of chopped tomatoes. (Or a couple large tomatoes, chopped).
  • 1 tsp red chilli powder
  • 1 tsp cumin powder
  • 1 tsp coriander powder
  • salt, to taste

Method:

Heat some oil in a pan. Add the bay leaves and dry red chillies. Fry for a couple of minutes.
Add the onion paste and sauté until the onion is golden brown.
Next, add the garlic and ginger pastes, fry for a couple minutes then add the tomatoes (if you use tinned tomatoes, add the juices as well) and fry for a few minutes more.
Add the red chilli powder, cumin powder and coriander powder. Cook for about 5 minutes.
Add the cooked red kidney beans, also add some of the cooking-water along with it or just add a little water.
Cover and simmer for approx 10 minutes.
Season with salt and add more water if needed, you want it to be a thickish consistency.
Garnish with coriander and serve with rice or chapati.

Serves 4

Sunday, October 10, 2010

Modelling Chocolate, Chocolate Cupcakes and Peppermint Frosting


After recently purchasing a syringe icing set, I kinda went a little crazy at the local library and issued out as many books on cupcake and cake decorating as I could manage to carry on my walk home. I couldn't even wait to get home to start reading them and had a few near misses with power poles. I have always had an interest in decorating and crafts, not to mention an obsession with playdough as a child, so when I spotted a recipe for making modelling dough from chocolate I knew i just had to try it. It was ridiculously easy to make, and it was loads of fun watching my boyfriend attempt to create jungle animals, while I enjoyed making decorations such as roses and bows. I also experimented with pressing the chocolate onto peppermint leaves to get an imprint. It was such a fun afternoon. After we had finished 'playing' with our food, I paired the resulting creations with chocolate cupcakes that I'd frosted with peppermint icing, as I'm a huge fan of the chocolate and mint combination. If you have never tried making/using modelling chocolate you should definitely give it a go, it sure beats playdough.


Modelling Chocolate:

300g plain chocolate
150g golden syrup
Cocoa, for dusting

Melt the chocolate then stir in the golden syrup, keep stirring until the mixture thickens. Don't worry if it looks like it has separated, it will form a smooth paste on chilling. Transfer the mixture to a plastic food bag and chill until the chocolate is firm enough to handle. Knead slightly before use, and if it's sticky, use a little cocoa powder

Note: The dough can also be rolled out like sugarpaste for covering cakes, or for creating cut-outs using fondant cutters. White chocolate can even be used, just use icing sugar instead of the cocoa if you find it too sticky to work with.

Makes enough for 12 roses and 36 leaves.

Chocolate Cupcakes:

125g butter, softened
125g caster sugar
2 medium eggs
2 Tbsp milk
100g self-raising flour (or use plain flour and add 1 tsp baking powder)
3 Tbsp cocoa

Cream the butter and sugar until light and fluffy. Add the eggs and milk, and sift over the flour and cocoa, then beat until mixture is smooth. Divide between standard sized paper cases. Bake at 190 Celsius for 12-15 minutes.

Makes 12.

Peppermint Frosting:

175g butter, softened
350g icing sugar
3 Tbsp boiling water
Few drops of green food colouring
Few drops of peppermint flavouring

Beat the butter in a bowl to soften it. Add icing sugar, boiling water, food colouring and peppermint flavouring. Beat until icing is very smooth. Spread, or pipe, over cupcakes.

Makes enough for 12 standard-size cupcakes.

*Modelling chocolate recipe taken from "Cupcakes", by Sue McMahon

Thursday, October 07, 2010

Brinjal Sambal (Eggplant/Aubergine with Chilli)


Eggplants have never really appealed to me and I often shied away from eating and preparing them. It's not that I ever thought they were unpleasant to eat, but just that they were a little uninspiring, and I guess I was mostly just uninitiated to their potential. But that changed once I tasted my friend's 'Brinjal Sambal'. It is such a simple dish with only a handful of ingredients, yet it somehow brought eggplant to life for me. It has a yummy spicy freshness to it and you can control the amount of chilli to suit your needs. I've also given options for tweaking the recipe so it can be made in a hurry; it will still taste delicious even if you are short of time and/or don't wish to do much preparation.

Ingredients:

1 large eggplant
1 onion, diced
1 tsp of garlic, onion and ginger paste (or just crush a couple cloves of garlic and a knob of ginger)
1 tsp sambal paste* (or use a teaspoon of red chilli paste)
3-4 large tomatoes, quartered (you can also substitute with a tin of tomatoes)
salt to taste
sugar to taste

Method:

Pre-fry eggplant in oil (or grill them), then set aside to drain on paper towels.
Heat oil and fry the onion, then add the ginger and garlic pastes, fry for a couple minutes more.
Add sambal and cook until oil separates, or until you can really smell the heat of the sambal.
Add tomatoes, salt, and sugar.
Once tomatoes are soft, add the eggplant and heat through and coat with sambal.

Serve with chapati

Serves 3

* To make the sambal:
Soak a handful of dry red chillis in boiling water then blend to make a smooth paste. If you want it less spicy, remove the seeds beforehand.
Note: The sambal should be fried before using; fry the sambal paste until the oil separates and then store in a container in the fridge (it will keep for a few weeks).

Sunday, October 03, 2010

Irish-Coffee Frosted Cupcakes


Usually I favour recipes and cooking methods that don't require much fuss or any special kitchen equipment. I don't own a food processor and my pestle and mortar is my best friend. I don't have cupboards full of gadgets, I don't even own a casserole dish. This is partly due to the fact that my budget only affords me an extremely slow accumulation of 'stuff', and partly because I have the time and inclination to do things the 'old-school' way.

That said, I still love to browse kitchenware stores and ooh and ahh over all the superfluous gadgets on offer. Last week was one such occasion. My friend had just invited me to dinner and I was to bring dessert. I thought this was the perfect excuse to part with some of my savings and purchase the super cute icing syringe set that I had been drooling over. To be honest, the cute tin sold it for me. I'm a real sucker for things that are functional AND pretty.

So now after my first foray into decorating cupcakes I don't know what's more fun: eating them or making them, and I reckon I will have to live off cupcakes for the next wee while just to practise my decorating skills. Oh what a shame.

I used a basic (and easy to remember) recipe for my cupcakes, as I wanted the flavour of the frosting to be the star of the show.

The Cupcakes:

  • 125g butter, softened
  • 125g caster sugar (I use vanilla sugar)
  • 2 eggs
  • 125g self raising flour (or use plain flour and add a teaspoon of baking powder)
  • 2 Tbsp milk

Beat the butter and sugar until light and fluffy.
Add the eggs, flour and milk and beat until smooth.
Divide the mixture between 12 cupcake cases and bake at 190 Celsius for 12-15 minutes, or until they have risen and are just firm to the touch in the centre.
Remove them from the oven and let them cool on a wire rack.

The Frosting:

  • 1 Tbsp instant coffee granules
  • 1 Tbsp hot water
  • 250g icing sugar
  • 125g butter, softened
  • 2-3 Tbsp Irish cream liqueur
  • Cocoa powder, for dusting

Dissolve the coffee in the hot water, then sift in the icing sugar and add the butter.
Beat mixture until smooth.
Add the Irish cream liqueur to taste.
Pipe a swirl on top of your cupcake, or just spread the frosting on top.
Dust with cocoa powder.

Makes 12

Wednesday, September 29, 2010

Chicken, Leek And Lemon Balm Pasties


The change of weather is finally here, goodbye winter. I'm so excited by these sunny days. Living by the beach has been such a novelty this year, and I can't wait until I can dip more than a toe in the water without losing all feeling in my limbs. I've also loved being out in the garden, it feels like ages since I've even worn a t-shirt as I've kind of been living in my thermals. So my last foray in the garden left me with both a slight tan, as well as the last bunch of leeks for the season. Ordinarily I would just tend to use leek in a soup, but this nice weather called for a different usage. The original recipe uses thyme, but the the lemon balm in the garden has been flourishing so I thought it'd be nice addition instead. I also used ricotta instead of double cream. The recipe is very forgiving. Btw the pasties are just as yum when eaten cold so they'd be great for picnics. You might also want to note that my pastry didn't turn out as 'puffed' as I would ordinarily like, but this was due to me using a soft margarine as it was all I had handy on the day. Like I said, the recipe is forgiving, and you could also chop and change filling ingredients like I did.

Ingredients:

For the pastry:
300g plain flour
a pinch of salt
150g chilled unsalted butter, cut into small cubes

For the filling:
25g butter
2-3 medium leeks (about 500g) trimmed and finely sliced
1 small handful of lemon balm leaves, roughly chopped
150ml ricotta
1 teaspoon Dijon mustard
400g boned chicken thigh and/or breast meat, or leftover cooked chicken, sliced
1 tablespoon oil
salt and pepper

To finish:
1 egg, lightly beaten with 1 teaspoon milk, for glazing

Method:

Make the pastry:
Mix the flour and salt, add the cubed butter and toss until coated. Add only enough iced water to combine the mixture into a firm dough (approx 8-10 tablespoons).
Use your hands to shape the dough into a rectangle then roll it out (in one direction, away from you) on a floured surface, to end up with a 1cm-thick rectangle.
Fold the far third towards you, then fold the nearest third over that (like folding a business letter). So now you have a rectangle comprised of 3 layers.
Give the pastry a quarter turn, then repeat this rolling, folding and turning process 5 more times.
Wrap the pastry in film and rest it in the fridge for 30 minutes, or up to an hour.

Make the filling:
Melt the butter in a fry pan, add the leek and lemon balm, sweat it gently 5-10 minutes until the leeks are very tender.
Stir in the ricotta, cook gently for a couple minutes then stir in the mustard and season well. Leave to cool.

If using fresh chicken, season it well then fry in oil over moderate heat until browned.

Lightly flour a work surface and roll out the pastry until 3mm thick. Use a plate, or cake tin, as a template, and cut out four 20cm circles.
You will have to gather the trimmings and re-roll to get your fourth circle.
Spoon the leek mixture on to one half of each circle then pile the chicken on top.
Brush the pastry edges with water then fold the other half of pastry over the filling to form a half-moon shape. Crimp well to seal.

Place on an oiled or lined baking sheet and brush the tops with beaten egg.

Bake for approx 25 minutes at 190 Celsius, until golden brown.

Serves 4

*the inspiration for this recipe came from a chicken and leek pastie recipe from Hugh Fearnley-Whittingstall's awesome book "River Cottage Everyday"

Monday, September 27, 2010

Banana Hazelnut Muffins


I love muffins with gooey centres, especially ones with contrasting complementary flavours, so I came up with this recipe the other day using my standard banana muffin recipe. I especially love it as it uses yoghurt in the mix, which imparts a yummy tang and leaves the muffin beautifully fluffy; I don't like muffins that are too sweet or too dense. And the yummy nutty sweet centre is just what the muffin needs to give it extra richness. I mixed the hazelnut spread with a little water and icing sugar to create the consistency I wanted, as I believed the hazelnut spread was too dense on its own and I didn't want to risk it sinking to the bottom. It all worked out ideally and now I have a new favourite muffin. Btw these keep really well, they will stay yummy and moist for days.

Ingredients for Muffin:

  • 1 cup natural unsweetened yoghurt
  • 1 egg
  • 2/3 cup vegetable oil
  • 2 bananas, mashed
  • 1 & 3/4 cups self-raising flour, sifted
  • 1/3 cup caster sugar
  • 2 heaped tablespoons vanilla sugar
  • chopped hazelnuts for topping

Ingredients for Filling:

  • 4 tablespoons hazelnut spread
  • 1 tablespoon icing sugar
  • 3 teaspoons water (depends on the viscosity of your hazelnut spread, I used Nutella and it was like concrete, so perhaps you will need less)
Method:

In a large bowl; combine the yoghurt, oil and banana.

Gradually add the dry ingredients and stir until just combined.

Spoon half the mixture into 12 greased or lined muffin pans.

Combine the filling ingredients and place a small teaspoon-sized dollop in the centre of each muffin then top with the rest of the muffin mixture.

Sprinkle with chopped hazelnuts and bake for 20-25 minutes at 180 Celsius.

Let them cool for 5 minutes in the pan before removing.

These are yum when eaten warm or cold.

Wednesday, September 22, 2010

Orange Oxtail Stew


I did something random the other day; I bought some oxtail, because I felt sorry for it. Call me weird but it looked very lonely on the supermarket shelf, like a pitiful little kid destined to get picked last for the softball team. So I thought I'd step out of my comfort zone and take it home and try to turn it into something that I would find appealing. One day I'd like to bring some offal home, but I'm not that brave yet. Anyway, I searched the Internet and recipe books for ideas to give my oxtail a bit of a makeover. I didn't find any recipes too appealing to my taste as most things looked a bit stodgy, so I decided to combine a few ideas and came up with this recipe. The resulting stew has such a fresh flavour thanks to the orange and cardamom, and the lovely tender meat made me forget how intimidating it was in its raw state (the appealing orange hue of the sauce also helped). I think the recipe would lend well to vegetables being added, as well as (or instead of) the lentils. And apparently oxtail stews taste better after a few days so it's probably best to cook it in advance, however, I did mine just a day ahead and was great. So I really can't wait to get stuck into the extra leftovers. Ugly ducklings for the win.


Ingredients:

800g oxtail
5 tablespoons flour
2 teaspoons salt
1 teaspoon ground black pepper
50g butter
2 onions chopped roughly
6 cloves crushed or chopped garlic
4 cardamom pods, remove the seeds
1 teaspoon caraway seeds
1/2 teaspoon ground black pepper
3/4 teaspoon turmeric
1/4 cup yellow lentils (eg toor dal)
2 bay leaves
400g tinned peeled tomatoes (chopped)
5 cups water (approx)
1 orange, skin on, cut into eighths
juice and zest of one orange

Method:

Rinse and pat dry the oxtail.

Toss the oxtail in a combination of the flour, salt and first measure of pepper.

Heat the butter in a large heavy based dish (use a casserole dish if you plan to cook it in oven, otherwise you can just cook it on the stove top or even use a slow cooker, I used a heavy cast iron wok of all things)

Brown the oxtail slowly over a low heat. Remove the meat then add the onions, garlic, cardamom seeds, caraway seeds, pepper, turmeric and lentils. Stir well then return the meat along with the bay leaves, tomatoes, water and orange pieces and zest and juice.

Cover and simmer on stove top for 3 hours, or bake (covered) in oven for 3 hours at 160 Celsius.

Check the seasonings and also reduce the liquid if needed.

If you like, remove the meat from the bone. Serve on its own or with rice or mash.

Serves 4-5

Sunday, September 19, 2010

Sesame And Couscous-Coated Chicken


We always have a stash of instant couscous in our pantry, as it's a handy item for the manthing to take on mountaineering trips, as a result...I don't actually often end up eating it myself. However, the other day I had planned to make chicken breasts for dinner but was bored with my usual method of cooking them and decided to experiment with a coating. I love cooking freestyle; grabbing whatever you have handy in the pantry or buying whatever's on special or seasonal (or unusual) at the market and supermarket, and then creating something unique that suits your needs and tastes. Sometimes this style of cooking works, and sometimes it doesn't, but thankfully this was one of those times where it worked, in fact it worked so well that I'll definitely be delving into our couscous stash again.

Ingredients:

1/2 cup instant couscous

zest and juice of a lemon

2 tablespoons sesame seeds

1 teaspoon paprika

2 teaspoons ground coriander

2 teaspoons ground cumin

1 teaspoon salt

1/2 teaspoon pepper

6 tablespoons flour

2-3 chicken breasts (skin and fat removed, washed and dried)

2 eggs, beaten

Method:

Combine the first 8 ingredients in a large bowl, add enough boiling water to cover the couscous by 2 cm. Cover and set aside until all the liquid has been absorbed.

Dip the chicken breasts into the flour, then into the beaten egg and then roll them in the couscous mixture, patting the coating on.

Heat some oil in a pan over a moderate heat. Sear the breasts for a couple of minutes on each side then pop into an oven for 12-15 minutes at 180 Celsius or until cooked through.

Monday, September 13, 2010

Pistachio and White Chocolate Chunk Cookies


I have a stack of Dean Brettschneider recipe books at home at the moment and had been drooling over this particular recipe for a while. Usually I tend to favour recipes that use affordable and/or seasonal ingredients, but I'm a big fan of pistachios -so despite the expense of them- I just had to try it. The manthing particularly loved them as they are a chewy and soft cookie. That said, if you prefer a more crisp crunchy cookie then just increase the baking time by a few minutes, it wont dry the cookie out.

Ingredients:


135g butter, softened
100g sugar
100g soft dark brown sugar
1 small egg
10ml milk
few drops vanilla essence or extract
150g plain flour
1/2 tsp baking soda
1/4 tsp baking powder
1/4 tsp salt
45g rolled oats, medium coarseness
55g pistachio nuts, coarsely chopped
140g white chocolate drops, coarsely chopped

60g pistachio nuts, coarsely chopped, for topping

Method:

Preheat oven to 175 Celsius (please note that I found this temperate a little too hot so I turned it down a smidge for my 2nd batch, but my oven is super old and perhaps is a little unreliable)
Beat the butter, sugar and brown sugar in a bowl until light and fluffy.

Add the eggs, milk and vanilla essence. Mix.
Sieve the flour, baking soda, baking powder and salt and add them to the creamed mixture along with the rolled oats. Mix well until evenly combined.

Add the pistachio nuts and white chocolate and mix until well combined.
Use a tablespoon to scoop spoonfuls (approx 35g) then roll them into round balls using floured hands. Place them 10cm apart on a lined baking tray. Don't flatten them or they will spread too much. Sprinkle a few of the extra nuts on top.

Bake for 8-10 min until golden brown. Place on wire rack to cool.
Makes 20 large, or 40 small cookies.

Wednesday, September 08, 2010

Chorizo, Curry Leaf, Ginger & Chickpea Soup


Despite New Zealand heading into spring, the days and nights here are still rather chilly. Particularly down south where I live. So lately I've been hauling out the soup recipes. This one is a particular favourite because it's so simple to make yet is still very flavoursome and is great for both lunch and/or dinner (it reheats really well). The curry leaves are a great addition and I keep a stash in my freezer. If you have never come across them then check out your local Indian store, however, you could also just replace them with another herb such as dried oregano. You can even make the dish vegetarian by replacing the chorizo with a couple of teaspoons of smoked paprika. It's a very moreish soup and technically this recipe would serve 6-8, but I find it serves about 4 (as a main).

Ingredients:

2 onions, sliced
6 cloves garlic, sliced
a handful of curry leaves
2 tablespoons olive oil
200g cooking chorizo, peeled and cut into chunks
2 thumbs of ginger, peeled and chopped finely
1 x 10cm sprig rosemary, using leaves removed from stem
2 bay leaves
1 large potato, peeled and diced
300g chickpeas, either from a tin (drained and rinsed) or cooked dry chickpeas
8 tomatoes, chopped (or use canned tomatoes)

Method:

Heat the oil in a large pot.

Sauté the onions, garlic and curry leaves on a medium heat, stir occasionally until they just start to caramelise.

Add the chorizo, ginger, rosemary and bay leaves and cook for another few minutes.

Stir in the potato, chickpeas, tomatoes, 400ml water and 2 teaspoons of salt.

Bring this to the boil and cover, simmer for 30 minutes.

Season again for taste and serve piping hot.

- Recipe adapted from Peter Gordon's a culinary journey

Sunday, September 05, 2010

Gefüllter Weggen ( A lemony twist-bread with a hazelnut filling)


Since I'm of Swiss heritage it's no wonder that I'm a sucker for European baking. I remember when I was travelling in India and we visited a small town in the desert in Rajasthan, and we came upon an internet cafe that operated as a German bakery on the side. I thought this was madness, but I could see why tourists would have appreciated it; the offerings were deliciously authentic. Usually when I travel I prefer to eat the local cuisine, but the cinnamon rolls were just too tempting. I'm a sucker for 'em. So if you have a penchant for yummy authentic European-style baking, then you should give this recipe of my mum's a whirl. I've formed them as my mother would with twists on the sides, however, you could form them how you wish; you could roll the filled dough like you would for pinwheels/cinnamon rolls etc, and also glaze them while warm.

Bread Ingredients:

250g flour
¾ teaspoon salt
the grated rind of half a lemon
30g sugar
30g margarine or butter, soft, cut into small pieces
1 & 1/2 teaspoons active dry yeast
100ml warm milk
1/2 a beaten egg (you will use the other half later in the filling)

Ingredients For The Filling:

150g cottage cheese (or better yet, use ‘quark’ if you have access to it)
1 & ½ tablespoons semolina
50g sugar
grated rind of half a lemon
50g ground hazelnuts
80g sultanas (optional)
½ a beaten egg

Ingredients For The Glaze:

50g icing sugar (powder sugar)
½ tablespoon water
1 tablespoon lemon juice

Method:

Place the flour, salt, lemon rind, sugar and margarine/butter in a large bowl.

Dissolve the yeast in the milk then add to the large bowl along with the egg.

Mix, then knead the dough until it is smooth.

Lightly moisten the dough ball with a touch of oil and set it aside (covered) in a warm spot for 2-3 hours.

During this time you may want to get the filling ready, just combine all the ingredients.

Roll out the risen dough to a rectangle approx 20x30cm.

Place the filling down the middle of the rectangle then fold the longer sides in towards the centre, letting them overlap a little. Moisten the overlapped edges with a little water and stick them together. Flip it so the seam will lie face down on your prepared baking tray. Make 6-7 evenly spaced cuts down each side; turn the resulting flaps in opposite directions on either side (see the photo for help).


Let it rise again, at room temperature, for 20-30 minutes.

Brush with a beaten egg yolk then bake at 180 Celsius, on the lowest oven rack, for 20-50 minutes (depending on the size that you form it). When ready it will be a nice golden brown all over.

Combine the glaze ingredients and brush onto bread while it's still warm.

Makes 1, however, this recipe doubles very easily.

Thursday, September 02, 2010

Focaccia Bread


I have been using this recipe for years and no longer have any idea where I acquired it from. It has definitely been a keeper though (even after trying other more 'complicated' focaccia recipes) because not only is it delicious, but it is just so unbelievably easy to prepare. There is absolutely no kneading involved...yay no messy floury bench to clean up...and the amounts of ingredients are a breeze to remember. One tip: if you use anchovies as a topping, like I have in the example above, then before baking you may like to drizzle it with the leftover oil in the anchovy jar/tin (instead of the olive oil) and skip adding any extra sea salt. The anchovy oil gives it an extra awesome flavour and helps impart a more golden crust.

Ingredients:
  • 1 cup tepid water
  • 1 teaspoon dry active yeast
  • 1 teaspoon ground sea salt
  • 2 cups of flour
  • extra virgin olive oil
  • toppings: sea salt, rosemary, olives, anchovies, onion rings
Method:

Dissolve the yeast in the tepid water.

Add the yeasty water to a large bowl along with a cup of the flour and the salt. Stir for 2 minutes.

Add the other cup of flour and stir for 3 - 4 minutes. Don't overwork the dough, you want it to be sticky.

Set the dough aside in a warm spot for a few hours. Alternately you can also refrigerate the dough until the next day, just remove from the fridge a couple of hours before you intend to bake it.

Pour the dough onto a tray and add the toppings of your choice and drizzle with some olive oil. I like to pat out the dough by prodding it with my finger tips, I also let the dough rise a wee bit longer after adding the toppings, approx half an hour, to help them adhere better.

Bake at 230 Celsius for 15-20 min. If you like the top more golden, turn the grill on for the last few minutes.

Monday, August 30, 2010

Spitzbuebe (Jam cookies)


This is another recipe taken from my mother's Swiss cookbook. I remember her making these a few times when I was a very small child, but this was the first time I'd attempted to make them myself. I found the key to it was keeping the dough cool in the fridge so it was easier to work with, as I guess is the case with most shortbread type cookies. So I didn't cut them out all in one go; I cut them out in batches while keeping the rest of the dough cool in the fridge. They can be a bit fiddly and time-consuming, but the end result is an adorable and tasty cookie that would make a perfect gift. Btw "Spitzbuebe" means a naughty rascal of a boy. Odd name for such a cute cookie.

Ingredients:
  • 250g margarine or butter, softened
  • 140g sugar
  • 1 egg white
  • 1 pinch salt
  • 1 tablespoon vanilla sugar (caster sugar that has been sitting in a jar with a couple of vanilla bean pods)
  • 350g flour

Method:

Cream the margarine and the first amount of sugar.

Add the egg white, salt, vanilla sugar and flour. Mix well then set aside in fridge for an hour or two.

Roll out on a lightly floured surface and cut out circles. Cut smaller hearts (or other shapes) into half of the circles. These will later be used as the 'lids'.

Bake for 8-10 minutes at 180 Celsius and leave to cool.

Sieve icing sugar over the 'lids'.

Fill them with berry jam that has been warmed and sieved to remove any seeds.

Makes approx 65 complete cookies in total (cookies being approx 4cm in diameter).

Friday, August 27, 2010

Tamarind and Chilli Beef Stir-Fry


It makes my mouth water just thinking about this dish. The sweet tang of the tamarind and the heat of the chilli, such a perfect combo. I really love recipes like this where you can cook them up in no time, and the simple ingredients create flavours that have the irony of being complex yet balanced, and of course - utterly delicious.

Ingredients:
  • 400g beef schnitzel, rump steak, or any cut suitable for stir-frying.
  • 1 tsp brown sugar.
  • 2 tsp coriander powder.
  • A few tablespoons of tamarind water (soak a little tamarind pulp in boiling water, use the cooled strained water).
  • Salt and pepper.
  • 4 tablespoons of red chilli paste (use less if you can't handle the heat).
  • 4 shallots, crushed to a paste.
  • 2 cloves of garlic, crushed.
  • A handful of vegetables of your choice.
  • Juice of half a lemon.

Method:

Slice the beef (against the grain) into thin strips.

Combine the sugar, coriander, tamarind water, salt and pepper. Mix this in with the beef and let it marinate in the fridge for a couple of hours.

Heat some oil in a wok (or pan) and brown the meat until cooked through. Remove the beef and set aside, leaving the oil and juices in the wok.

Add the chilli, shallots and garlic to the wok. Stir-fry for a couple of minutes.

Return the meat to the wok along with the veges of your choice, stir well.

Squeeze lemon juice on top, and serve.

Makes approx 4 servings.

Sunday, August 22, 2010

Rosemary Biscuits


These biscuits are so simple in both ingredients and method; they are effortlessly delicious. They have all the satisfaction of a crumbly shortbread, but have the added bonus of a yummy flavour hit of rosemary.  If you have never tried rosemary in sweet baking before then you should definitely try these, you might become a convert like me. I find them perfect to munch on while enjoying a herbal tea.

Ingredients:
  • 55g sugar
  • 115 butter, softened
  • 170g flour
  • 2 tablespoons of finely chopped fresh rosemary

Method:

Mix the sugar, butter and flour until combined. It is easiest to use your hands.

Knead in the rosemary until a nice smooth ball of dough is formed.

Let the dough rest in the fridge for 15-30 minutes.

Roll out the dough 5mm thick and cut out the biscuits. I like to use mini cookie cutters.

Set out on a greased or lined baking tray, leaving a small space between each.

Bake at 180 Celsius for 10-15 minutes until they start to go lightly golden.

Makes a small batch: approx 40 mini cookies, or approx 15 'regular' sized cookies.

Friday, August 20, 2010

Pizza Napolitana


When I was a kid our home-made pizzas would often have tinned spaghetti as a main topping. Mum would create them on a Sunday night and we'd all hunker down in the lounge and munch on them while watching Our World (a nz nature doco show). Now although we all thought this was truly delicious, every now and then my mum would also whip out her 'Swiss' pizza recipe. Now this, was the ultimate. This was also my first introduction to what an authentic pizza should be like. It even made me grow to love anchovies, mmm anchovies. So here is the the translation of the original recipe for this yummy thin-crust pizza.

Note: I love to add other stuff like mushrooms, and my mum didn't use mozzarella (was probably impossible to find back then) so feel free to use other things you prefer, however, I'll never skip the anchovy. Don't skip the anchovy. Did you know I like anchovy?

Ingredients:

250ml milk (lukewarm)
1 and 1/2 tsp active dried yeast
375g flour
2 tsp salt
1 tsp oregano
1 tsp onion powder
1/2 tsp paprika
2 tablespoons oil
80g butter
Toppings:
8-9 tomatoes (sliced)
200g mozzarella
1 tin anchovies
a handful of black olives (chop or leave whole)
2 onions, sliced into thin rings
1/2 tsp black pepper
1/2 tsp thyme
1/2 tsp rosemary, finely chopped
1 tablespoon oregano
6 tablespoons olive oil

Method:

Warm 50ml of the milk to a lukewarm temperature, then dissolve the yeast in it.

Mix the flour, salt and herbs in a large bowl; form a hollow in the middle and pour in the oil.

Heat the remaining 200ml of the milk and melt the butter in it, then add this to the flour mixture along with the yeasty milk.

Stir everything together and then knead by hand for a few minutes.

Cover and let it double in size in a warm place.

Divide the dough in 2. Roll, or pat, them out on a lightly floured surface until they are half a centimetre thick. Ideally it will make two 20 cm round pizzas.

Place the pizzas on a tray or tin etc. Layer with sliced tomatoes, mozzarella, anchovies, olives and onions, and scatter on the herbs. Let them rise again for a little bit.

Drizzle with olive oil before baking at a moderate temperature, about 190 Celsius is ideal for this amount of toppings and should take 15-20 minutes.

Btw feel free to prepare the pizzas in advance, especially if you want to serve several at a time. Just cook them briefly and take them out of the oven when they are still pale and set them aside. Then later on bake when you want them, heat them until they become golden brown, should only take a few minutes.

Makes 2

Sunday, August 15, 2010

Schwarzwalder Kirschtorte (Blackforest Cake)


My boyfriend's birthday was coming up so I asked him what kind of cake he'd like, his response was swift: a blackforest cake. I was a little intimidated to try it but I'd seen my dad make one a few times (he's a huge fan of them too). So I contacted my dad and asked him to send me his recipe (which was all in Swiss-German). I was still unsure whether I could handle it, and was looking at other chocolate cake recipes...that was until I received a parcel in the mail, from my parents, containing the recipe and most of the ingredients I would need to make it. Side note: my parents are awesome. After a lot of fun attempting to translate the recipe I ended up making the cake and it turned out to be a success and the boyfriend loved it...so did I.

The Cake:

  • 120g margarine or softened butter
  • 120g sugar
  • 6 egg yolks
  • 2 tablespoons kirsch
  • 2 tablespoons water
  • 120g almonds, peeled and ground
  • 120g dark chocolate, grated finely
  • 1 tablespoon vanilla sugar
  • 120g flour
  • 1 tablespoon baking powder
  • 6 egg whites, beaten 'til stiff
  • 1 pinch salt
Method:

Beat the margarine/butter, sugar and egg yolks until foamy.

Fold in the kirsch, water, almonds, chocolate and vanilla sugar.

Sieve in the flour and baking powder and add salt, mix lightly then fold in the beaten egg whites.

Bake in a 25cm tin for 50 minutes at 175 Celsius.

When cool, slice the cake twice horizontally to create three equal layers of cake.

The Filling:

  • 1 tablespoon kirsch
  • 1 tablespoon water
  • 3 sheets of gelatine
  • 500ml cream
  • 700g sour cherries, drained

Method:

Mix the kirsch and water and drizzle it over the three layers.

Dissolve the gelatine according to the directions on packet, then fold it into the beaten cream, coat the two bases leaving some cream for decoration.

Distribute the cherries on the two layers, then place the two layers on top of each other then place 'lid' on top.

Coat the entire cake in cream and decorate how you wish. I chose to melt some of the leftover dark chocolate and smear teaspoonful sized blobs on greaseproof paper to create some shards to place around the edges and top. I then just grated some milk chocolate on top.

Thursday, August 05, 2010

Spicy Kumara Strudel


If you were to sit a plate of roasted vegetables in front of me, I'd skip all the other veges and go straight for the kumara. So i thought I'd create a dish that incorporates them in a different way, but still embraces the yummy chunky goodness of a roasted kumara. I guess it also reflects my Swiss-German and Indian connections. I love how the pastry on the inside of the strudel takes on a soft pasta-like texture, not at all chewy like you might expect. I used an orange kumara because I love the vivid colour, but any kumara, or even solely using potato would also work nicely.

Ingredients:

Pastry:

50g butter, cubed
200g high-grade flour
pinch of salt
100ml cold water

Filling:

2 Tbsp oil
1/2 tsp cumin seeds
1/2 tsp mustard seeds
1/2 tsp chilli powder
2 sprigs curry leaves
1 medium onion
2 cloves garlic, crushed/finely chopped
1 Tbsp crushed/grated fresh ginger
1/2 tsp turmeric
400g (approx one large) orange kumara, peeled and cubed
100g (approx one small) potato, peeled and cubed
100ml hot vegetable or chicken stock
salt to taste

Method:
  • Bring the oil to a medium heat and fry the cumin seeds, mustard seeds, chilli powder and curry leaves until aromatic (just a minute or so).
  • Add the onion, garlic, ginger, turmeric, kumara and potato. Sauté for a couple minutes more then add the hot stock and cover and simmer for 10 minutes.
  • Remove lid and simmer until all the liquid has been absorbed. Salt to taste and set aside to cool.
  • To make the pastry:

    • mix the butter, flour and salt in a bowl, using your fingers to rub in the butter. Add the water and work it into a soft dough. Wrap in food-wrap and chill in the fridge for at least 30 minutes.
  • Preheat the oven to 180 Celcius
  • On a lightly floured surface roll out the dough as thinly as you can.
  • Spread the cold filling over the dough then start folding the pastry over the mixture to form a large roll. Stop halfway to fold in the edges as if you were making a giant spring roll.
  • Place the roll on an oven tray lined with baking paper and bake for approx 50 minutes.
Serves  at least 4